|
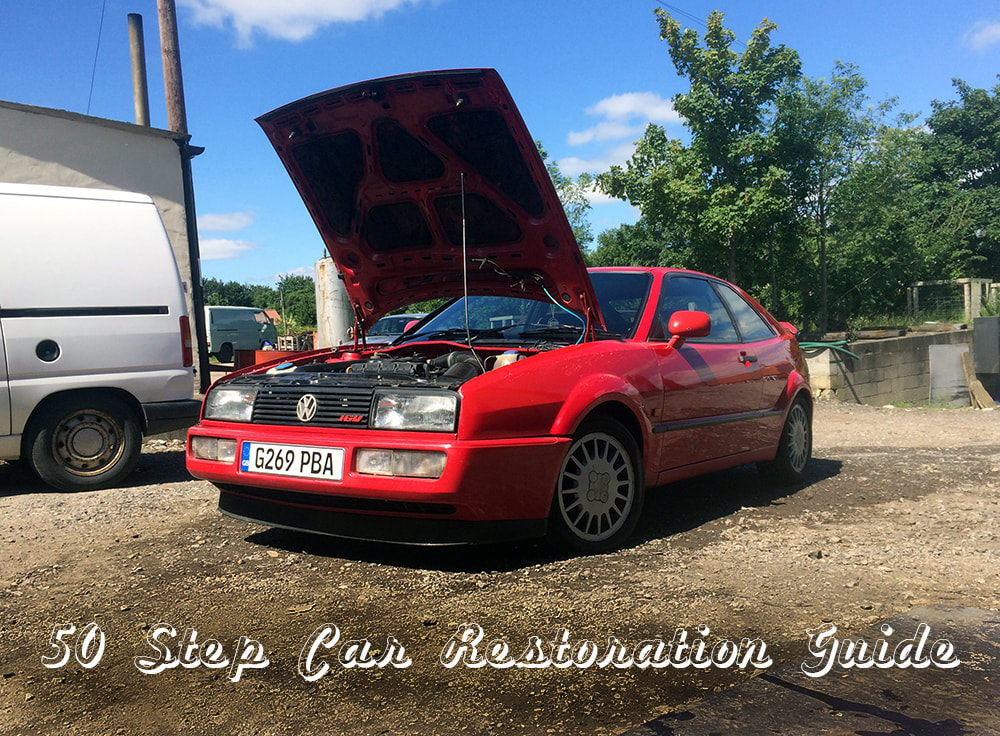
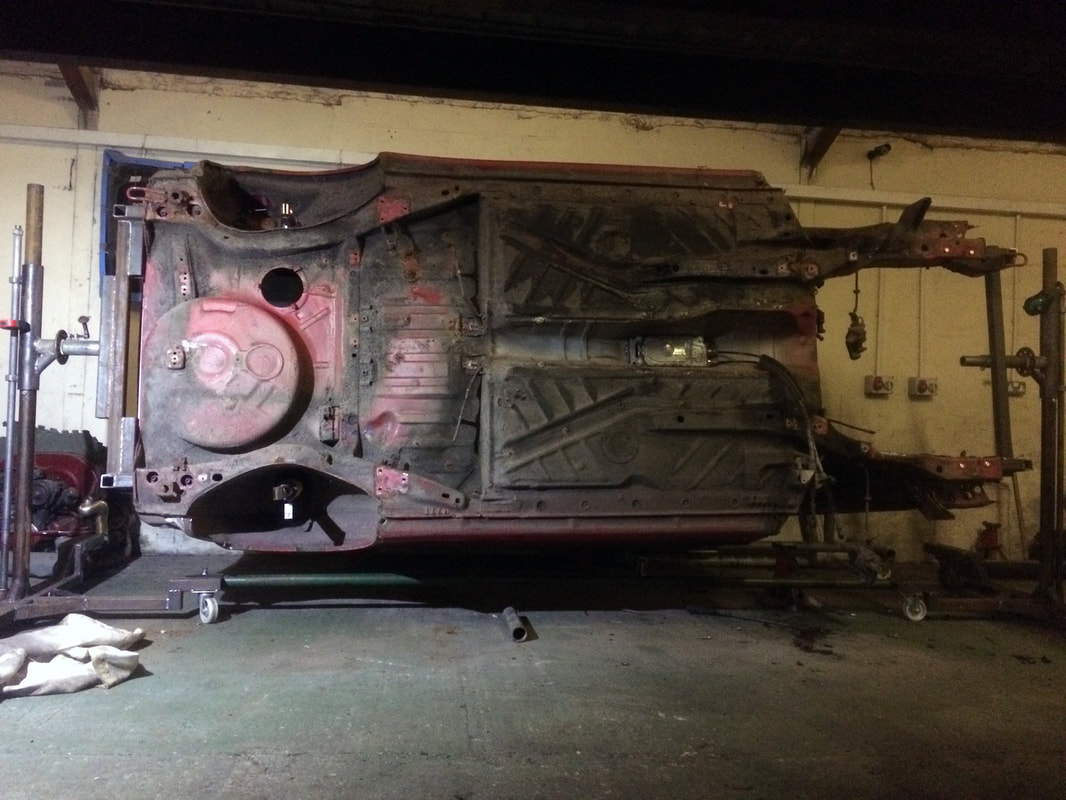
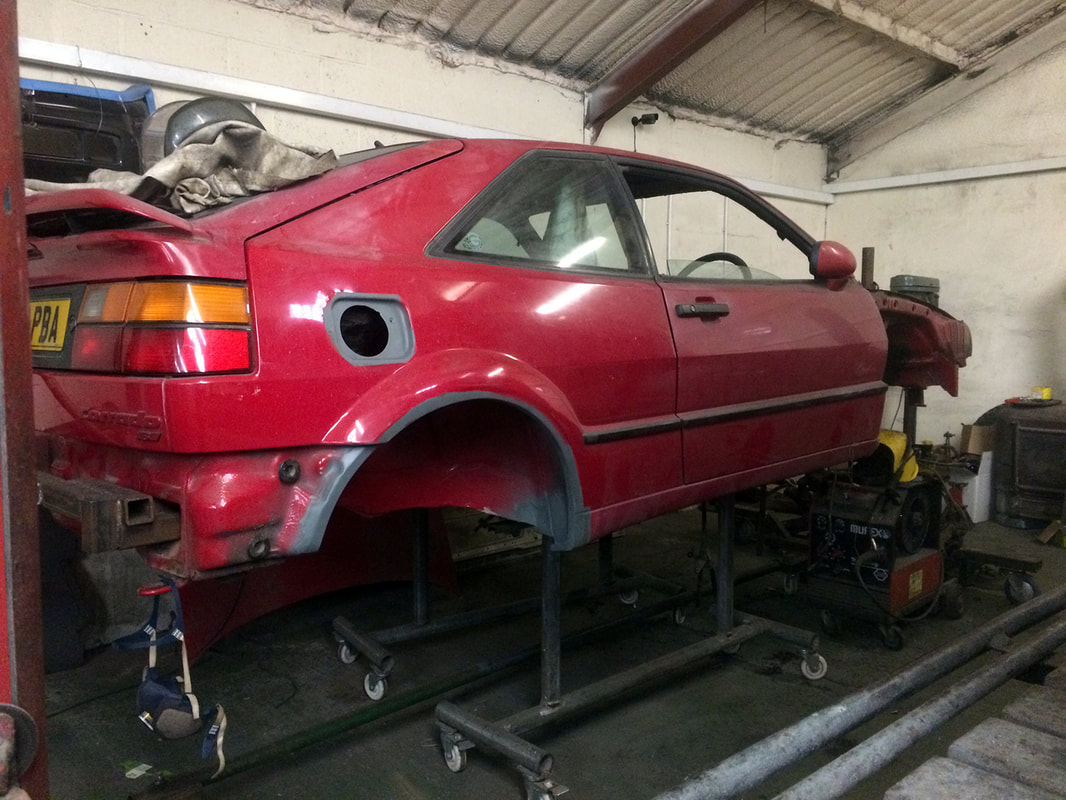
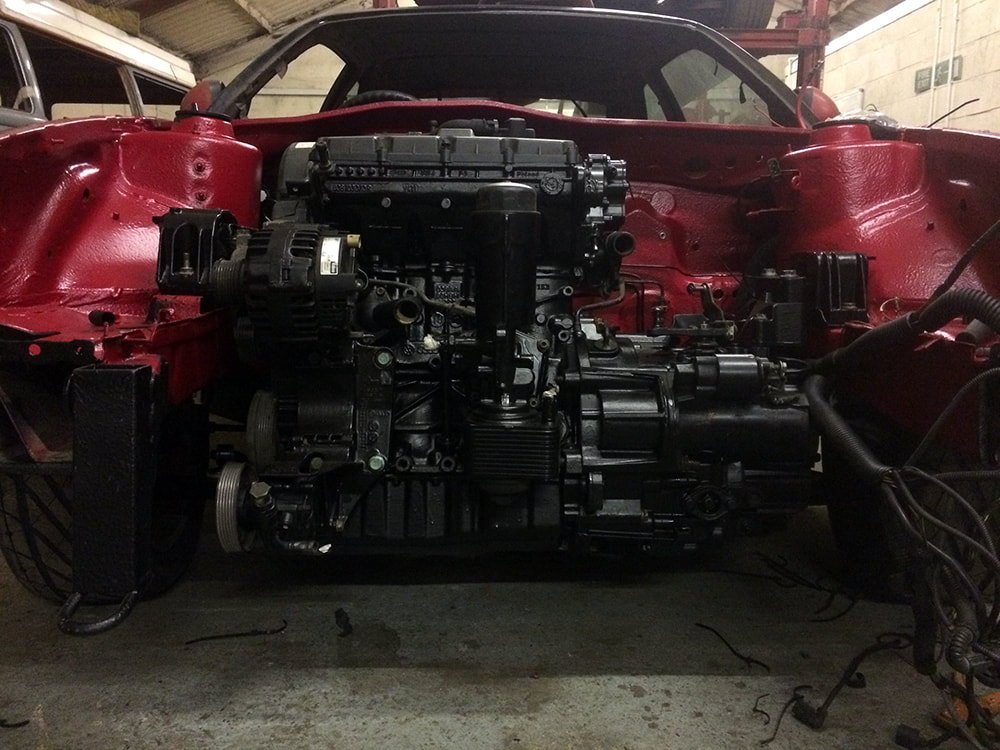
For more in-depth videos on car restoration check out our YouTube Channel! How much does a car restoration cost? The big question anyone who’s ever wanted to take on a car project has asked. Well, we believe in giving straight answers- but (here’s the part you don’t want to read) it depends. Depends on what? You might well demand to know. Lots of stuff- the type of car you choose, for one, which affects things like parts availability and the difficulty of the work involved. But that's not all. You could bring us two identical classic cars, for example two 1971 VW Beetles, and the cost of restoring each one would still vary because it depends on what each individual owner wants from a restoration AND what condition the original car is in. If the first Beetle has been dry stored in a barn for the last 40 years and the other one has been parked on a beach there’s going to be some noticeable difference in the state they’re each in. So what vehicle you choose is clearly important- whether it’s a perfect example of the vehicle or a disgrace to cars everywhere, as well as your own experience restoring cars and your ambitions for the project. But worry not. If you’re thinking about restoring a car but don’t know what’s involved or where to even begin, you’re in the right place. We’ve created an essential guide that details the basic steps to restoring a classic car. From start to finish, here is everything you need to know about restoring a classic car and the order in which you should be doing it. Not everyone with a car project will follow every step on this list as, like I said earlier, it depends on what you choose to do, but if you wanted to go all the way and fully restore a car this guide details what you should be doing. PLANFail to Prepare? Prepare to Fail1) BudgetFirst step, figure out how much money you want to spend. It's completely fine to have a small budget, that just means you'll have to carefully plan your project (you should anyway, but it's even more important with less cash to spare as mistakes can be costly). Our advice would be: don't try to do everything on the cheap, spend money on doing the things you really care about to a high standard so you end up with a car you're proud of. 2) Buy a VehicleVery important step! Resist the urge to buy the cheapest thing you can find and get something you can actually work with. A rotten pile of junk is best left in the field you found it and will cost you more in the long run even if it is a bargain price. Take someone with you who has a clue what they’re looking at and can curb your enthusiasm. Have a read of my guide to buying a classic car for more details on this point. 3) AmbitionFigure out how far you want to go with the project. Will it be a nut and bolt restoration or just some work to make it solid, safe and usable? Obviously the bigger your ambitions the more money you'll need to spend and time you'll need to commit. 4) LocationWhere will you do this project? Consider that once you’ve stripped down the car you’re going to need a space roughly the size of the car again to store all that stuff as well as a good sized area to work on the vehicle. You'll be amazed how much space car parts take up when they’re not actually on the car. Having just finished one very long car project and sold another one on earlier this year I’m still shocked (and delighted) by all the extra space we’ve acquired in the workshop. And these were pretty small cars, too. 5) Style and ThemeThis part is fun. Plan what your car will look like when it’s done. Get a Pinterest board on the go, go to shows, browse eBay and look through some magazines. You need an idea of what you want the finished project to be before you begin so you don’t make snap decisions on the fly and end up regretting it. Consider how everything is going to work together as a whole- interior, paint job, wheels, etc. For more information on planning your car project's aesthetic read the article I wrote about it. Then get back to work. 6) TimescaleHow much time do you have to commit to this project? Get out your calendar and write down what you’re going to do and when you’re going to do it. Be realistic, set yourself achievable goals. Work out your deadline (then, probably double it.) 7) Who You'll UseWho will be doing the work- professionals? You and your mates? Contact people in your area for quotes and advice, or nail down your friends to making time commitments. You should always give something in return for help, even if it’s just a meal, or those friends that were so willing to offer assistance when you announced the project will quickly drop out. Lure them in with promises of food and then, actually provide the food (or lock the door and swallow the key, your call). 8) ToolsDo you have the tools you need to do the job right? Can you afford to buy them? Rent? Borrow? Steal? Just kidding, we don’t condone theft of any kind. (Do not steal tools, I repeat, do not steal tools). Figure it out now so you can keep on schedule. Stuck for ideas? Check out my article 10 Tips to Save Money on Tools for some pointers. 9) Research Parts AvailabilityYou might not know what needs replacing at this point but research the best places to source parts so you can quickly order them when you need to. Note that the well advertised, specialist online companies are not the only place to buy parts and certainly not the cheapest either so if you spend a little time researching it at this point you can save money. 10) Buy a Haynes ManualOr something similar. There’s lots of useful information you won’t be able to easily find anywhere else, such as torque settings and how to strip down and service parts, which leads us into the next section... STRIPPoint of No Return. Last Chance to Change Your Mind!1) Document EverythingTake pictures before you start and during the stripping process. Have videos of how things come apart because, although it's usually simple to dismantle a car, when you come to reassembling it many months later it will be impossible to remember how everything came apart and where those strange shaped bits of car actually go. Most importantly label everything. It will save you a ton of time in the rebuilding phase. Speaking from experience here, it took us and two friends an entire day to refit a car interior and most of that comprised of searching parts numbers on the internet to figure out what stuff actually was (thank you, VW, for putting part numbers on even the smallest bit of trim!) 2) Take Out the InteriorClean everything and store it away somewhere it won’t get covered in dust and overspray. Don’t throw away anything yet even if you plan on replacing it as you’ll need it to compare and make sure you buy the right parts. If this isn't possible because you’re desperate for the space or money to fund the project don't worry, just take lots of pictures before you get rid of anything. 3) Engine and Gearbox OutDrain all the fluids out before you begin to avoid making a mess of the floor. Using an engine crane can make the job a lot easier depending on what car you're working on. Label all the wires as you take them off the engine, even if you think it's obvious (see first point). 4) External Panels OffBumpers, wings, ect. Careful not to break any specialist clips that may be difficult to buy. 5) Remove Window GlassIf they're the old style ones with rubber seals the best way is to (carefully!) slice the seal with a Stanley knife. Don't be tempted to re-use dried out old seals as they will leak when you refit them and cause your window sills to rot out. If the window glass is bonded in, as with some modern classic cars, it will be much trickier to remove so might be worth getting a specialist in to take them out rather than risk breaking them. 6) Wiring OutLabel everything! Check for any damaged or dodgy wiring that will need sorting later on. 7) Install on RotisserieOr axel stands if you don't have a rotisserie or (horror!) your vehicle isn't solid enough to be put on one. A rotisserie isn't necessary but it will save time and help you do a better job if you need to do a lot of welding to the underside as you won't have to work on your back. 8) Running Gear OffFlip the car on its side or jack it up and remove everything on the underneath- steering rack, brakes, ect. At this point decide what you’re replacing and refurbing. 9) Send Parts to Powder CoatersAny rusty bits not being replaced can be sent off for stripping and powder coating or set aside for cleaning up. Although it is an extra expense we'd definitely recommend powder coating for every easily removable metal part- such as metal bumpers, wheels and axels as it looks great when done properly and is so much more durable than paint it will be worth the extra money in the long run. We've often found powder coating works out much cheaper than having parts repainted too. 10) Order Parts that Need ReplacingOr make a list of parts you need if you don’t have the space/ budget to order it all in one go. BODYWORKThe Hard Work Starts Now1) Strip PaintTo do a complete, bare-metal restoration you'll want to strip all the paintwork off the car to see what's hiding underneath. How you go about it is up to you. Blasting and/or acid dipping the entire shell is the best option if you’re doing a proper job of it, but you’ll probably want a professional to do it which means figuring out transport and is the most expensive option. A rough price for blasting a complete shell can be upwards of £1K. Check out my guide to blasting a car for more details on what's involved with that. The best DIY option is stripping all the paint off with a wire brush on an electric grinder but note this is very time consuming (and I’ve killed a fair few grinders this way.) Sanding all the paint off is another option but you won’t get into the cracks to get the rust out like you do with a grinder. Paint stripper is also an option but we’ve never had much success with it (it's very messy and doesn't really do much, in our experience). 2) Fix any rust and dents you’ve foundNow you've got all the paint off and you can see how solid the bodywork is, the next job is fixing any rust and dents you've found. Again there’s a few options for how you want to do this. My guide to preventing rust on your car goes into a bit more detail on how to deal with rot. Chopping out the rot and welding in fresh steel is the best option but as with blasting it's also the most expensive, unless you can do it yourself, in which case it's just time consuming. Replacing panels is the easiest option for removable panels such as wing, bonnets and doors but you need to source decent parts which can be a challenge if it's a rare car. Stripping back and treating the corroded metal is a quick fix but in our experience this will just delay the rot rather than get rid of it altogether. 3) Treat the Underneath and ArchesWhen it comes to dealing with the underneath of a car undersealing is the bulletproof option- but it doesn’t look that nice. Paint is best if you want it to look pristine for a show finish but not exactly practical if you want to use the car more than a few times a year- you’ll be chasing stone chips forever! The best option for us has been coating the underside of the car in U-Pol Raptor- it’s like paint but tougher. The finish isn’t as nice but it can be tinted to the colour of your car so it looks a lot better than black underseal whilst offering way more protection than paint. 4) FillingEven with an awesome welder on the job, most cars will need a bit of filling. Not too much though, or it will just eventually crack and look terrible. We always coat bare metalled areas in etch primer first to seal the metal and give a good key. For more in-depth detail on the steps to painting a car have a look at my earlier blog post about painting cars. The most important thing to know now we're moving into the painting bit is that your work area needs to be super clean and dust free. You need to panel wipe the vehicle in between every one of these stages to get a smooth, professional finish with not bits in it. Also make sure that anything you stripped off the car earlier like window glass and interior is well covered up to protect it from overspray, or ideally remove it from the area altogether. 5) PrimingSpray the shell with high build primer. If you've missed anything in the filling stage it will become apparent after this step. 6) SandingLightly sand the high build primer with 500 grit. This stage requires patience- you don't want to sand back too much, definitely not back to bare metal, or you'll have to repeat the priming step. 7) Paint the CarAfter all the prep work you're ready for the fun part- painting! 8) Flat BackIf there's any runs, dust or imperfections flat back the paintwork with some very very wet 2000 grit sandpaper. Once again DO NOT overdo it at this stage or you could ruin the bodywork. 9) Polish the CarMachine polish the entire bodywork to give it a professional finish 10) Waxoyl the Car Inside and OutWhen the bodywork is completely done the last step is rustproofing the whole vehicle with (clear!) Waxoyl. Doing it at this point means it has time to set and the strong smell of it should have gone by the time you want to take the car on its maiden voyage. ENGINEHang in There, Just One More Tricky Part to Get Through Now1) Recondition or Upgrade?Decide if you're upgrading or reconditioning the engine. If you're on a tight budget at the very least replace all the external seals and gaskets on the original engine so you know it won't have any leaks. We would advise also doing the timing belt and water pump while the engine is out for peace of mind (and as it's easier). If you've got more of a budget you can send the engine away to a specialist to have it checked over and any worn parts replaced. If you're upgrading the engine with a different one for more power or reliability you need to first source a good engine. Choose something with low mileage that you can, in a perfect world, see running before you buy. A good compromise is upgrading parts of the engine without the expense and hassle of changing the whole thing, such as fitting an uprated turbo, fuel pump, intercooler or induction kit. 2) Mount the EngineIf you're putting in an engine that's not standard to the car you'll need to fabricate new engine mounts and figure out where everything will go. Even if you're keeping the same engine you might need to relocate some stuff if you're fitting uprated parts or want to have a "shaved" minimal engine bay and move some stuff to the boot such as the battery. 3) Do all the Engine WiringWork out where you're going to run the wiring. If you're doing a show engine bay you might want to hide the loom so work out how to do that. If upgrading the engine decide if you're doing a loom splice or completely fitting a new loom. If you fit a complete new loom you have the benefit of knowing the diagnostics system works properly but there is more effort involved. Splicing the loom is a quicker job but make sure you know what you're doing as it can cause problems down the line if you need to diagnose faults. 4) Get the Engine RunningNow you've mounted the engine and wired it in get that baby running. Make a note of anything that's not working properly and needs to be replaced. At this point you can easily figure out what the problem is and fix it. Getting the engine running now will give you peace of mind knowing that everything works fine and you don't need to do more modifications once everything is painted and finalised. 5) Rip Everything Back OutNot literally, though. Carefully remove all the wiring and engine. Finalise the bodywork if you've had to do any modifications to the engine bay (like fitting new engine mounts). Get it painted, U-Pol raptored or undersealed (see Bodywork, point number 3). 6) Strip Down all Auxiliary PartsRemove anything from the engine that you can unbolt easily including:
7) Order New Auxiliary PartsIf needed or recondition original bits. 8) Send Away Bare Engine for Internal Strip DownA specialist can do things like check tolerances, look at bearings for wear and any other internal damage such as worn valves and valve seats. 9) DetailingMake that engine look its best. Paint the (metal!) auxiliary parts- we use engine enamel in a tin. If you want to try something a bit different wrinkle paint is nice or try powder coating or chroming. Give any plastic parts a good clean too. 10) Build it Back Up (Out of Vehicle)Fit all new gaskets and seals on rebuild. Don't cut corners and re-use seals because, as stated earlier, you'll probably get it back together and they'll leak. REBUILDAlmost there! Refit all parts and new stuff, in this order:1) Brake SystemStart with rebuilding the underneath of the vehicle. Make up and fit new brake pipes whilst there is nothing to get in the way. 2) Fuel SystemRefit fuel lines or make up new ones if needed. It's best practice to replace any old rubber lines as they'll perish and crack with age. Fit the fuel tank. 3) SuspensionDepending on how far you're going with the rebuild either fit new replacement parts like arms, shockers and bushes or fit refurbished old suspension. At this point you should have just about everything on the underneath that you need on so you can now fit the wheels and take it off the rotisserie/ axel stands ready for the engine to go in. 4) WiringTake care of the wiring now so you've got good access if it runs behind the engine. The inner vehicle loom can also be done at this point (make sure to lay extra wires needed for any upgrades.) 5) Engine and Gearbox InDepending on which vehicle it is, it may or may not make sense to do both the engine and gearbox at the same time. 6) Cooling SystemPlumb in all the cooling system (assuming it's water-cooled.) See my article about the difference between air-cooled and water-cooled systems on engine for more information on that. 7) Refit GlassWhen re-fitting the glass use non setting window sealer on vehicles with old-style rubber seals (not bonded) as even the best quality seals can still leak and you don't want water getting in and undoing all your hard work. As with removing bonded windows, you might want a professional to refit them. 8) Refit Exhaust, Lights and any Other Exterior TrimA stainless exhaust system is pricey but will save money in the long run as it should never need replacing. Upgrading to LED lights is also a good option as they're brighter, clearer and should last longer, not to mention can transform the look of your vehicle. 9) Interior and Comfort UpgradesDepending on how long your car has been in bits, this is where lots of pictures and labels (and Google and Youtube) will come in handy. You could also fit a choice of upgrades such as:
10) Test DriveThe final and very important step. Just because you've rebuilt everything doesn't mean the car is ready for a 200 mile road trip. Take that car on lots of small journeys to clock up mileage before you even think about taking it far away from home. There will very likely be small issues that need ironing out that will only become apparent when you start using the car regularly. Don't cruise along with the radio on flat out, this isn't a joy ride. Keep an eye on your gauges and pay attention to every noise the vehicle is making, listening out for signs something's not right. Once you've done about 100 miles at least you can start to relax a bit. To Summarise...So there it is, a basic guide to restoring a classic car in 50 easy steps. The main five steps I've covered here- plan, strip down, bodywork, engine and rebuild apply to every car project, how far you go with each section and what order you do it in will depend on what you want.
Comments are closed.
|
watch our new youtube channelOur blog delivers brutally honest advice for the “rotbox” in your life with the aim of raising the standard of car projects everywhere.
Practical, direct, actionable ideas and zero bull. Read on. About
|
AboutWe're a dedicated, independent fabrication company based in rural North Yorkshire that specialises in light general fabrication work including CNC plasma cutting and CNC sheet metal bending.
|

